Fox Statler’s Anatomically Correct Minnows
Fox Statler’s Anatomically Correct Minnows
What are anatomically correct minnow patterns?
They are minnow imitations that are as near as possible to the real thing. They imitate the real minnows life colors, breeding colors, body markings, body style, and size. It is an attempt at Fishin’ What They See. And what predator fish see are more colors than there are in flowers. That is correct, there are more colors in fish than there are in almost any other group in the world. Fish have one color that is a hard one to find in the plant and animal kingdoms, and that is “the absence of color”, transparent, clear, etc. Nature also combines colors and transparency in the same fish. For example, a minnow’s fins can be red, or blue, or white, or even yellow; but at the same time we can see through them. Cave fish are so clear that the red color we see in them is the collection of blood vessels within the heart and gill areas. Modern day bass lures lack this very important quality. Most bass lures are made of white plastic and then painted with an opaque paint. Lures that are made of clear plastic look like bubbles under the water.
Here are the advantages to creating my minnows. One, most of the materials are transparent yet have color. Two, the eyes and hook add to the correctness of the imitation. You can’t see through the head of a minnow and the shank of the hook appears as the vertebrae of the fish. Three, they don’t appear as bubbles or dark blobs, but shine and glisten in the sunlight as real minnows do. Four, because the materials are thin fibers, the minnows swim with the slightest of movements. They swim when laying on the bottom. No other imitation can compare with the life-like movements of these patterns.
I once heard that all flies catch fish. These do too. From Sunfish to Musky, they all eat these minnows. These patterns work in salt water as well. Although they are the newest idea in fly fishing patterns, I have worked on this project since 1989, and believe me , they work. My next book will have at least 347 patterns so that any angler east of the Rocky Mountains can create their choice of patterns to imitate what is in their rivers and lakes. Presently Spirit River, Inc. of Roseburg, Oregon is commercially producing seven of my anatomically correct minnow patterns. They are imitations of seven abundant and widespread minnows of the Mississippi, Great Lakes, and Atlantic drainage systems. Ask about them at your local fly shop, tackle dealer, or visit www.fishinwhattheysee.com .
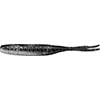
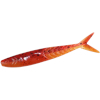
Alewife
(Anadronomus or Freshwater)
Clupeiformes Clupeidae Alosa pseudoharengus
Maximum Size: 14”
Shape: Slab-sided
Suggested Hook & Size: Mustad 33909 #1/0 - #14
Thread: Gray 8/0 Uni-thread
Tail: Pearl Blue Magic Hanked Lite-Brite color a Cool Gray Prismacolor Pen tail
Tail Fin: Cool Gray Prismacolor Pen
Body: Pearl Blue Bodi-Braid
Eye & Insert: Silver Spirit River Real Eyes (3/8 Deep See Eyes for #1/0, and 7/16 Deep See Eyes for larger) with Priz Silver 3-D Molded insert
Lower Side: Pearl Blue Hanked Lite-Brite
Upper Side: Silver Hanked Lite-Brite with a small Black Prismacolor Pen shoulder spot
Snout Color or Change Thread: Gray
Belly or Stomach: Pearl Blue Hanked Lite-Brite
Dorsum or Back: Silver Hanked Lite-Brite with River Green Hanked Lite-Brite over
Head Color: Blue Green
Cheek & Chin Color: Pearl Blue
Pectoral Fins: Clear
Anal Fin: Clear
Pelvic Fin: Clear
Dorsal Fin: Clear
Colored Markers: Cool Gray Prismacolor Pen for tail: Black Prismacolor Pen for small shoulder spot:
Tying Notes: None
Distribution: A native to the Atlantic Coastal Plain rivers from North Carolina northward, in abundance in the Great Lakes and some large reservoirs in Tennessee, the Watauga and Dale Hollow and their tailwaters.
Habitat: Prefers very cool to cold large open waters.
Spawning Period: April to August.
Spawning Habitat: In the shallows of still waters.
Important Notes: An extremely important forage fish for Muskellunge, Walleye, Smallmouth, Trout, Salmon in the Great Lakes and other large predators.
Instructions
Because of the Alewife’s maximum size we can imitate it in varying lengths. However, the young-of-the-year grow to 2-3 inches. This is the size that I prefer because there will be more of this size in any body of water. You might want to tie this pattern larger or smaller, depending upon the prey that you are after. For Crappie I would use smaller imitations, but for Musky I would use larger imitations. For larger patterns there are two choices of eyes . The Deep See Eyes by Spirit River are made of aluminum and are light for their size. A clouser tied with this eye will not be as stable as those with brass eyes, but I am not saying that an unstable clouser is a disadvantage. All fish swim on their sides at times. The second eye is Spirit River’s I-Balz. These eyes are very heavy for their size. A 3/16-inch I-Balz is equal to or more than a ¼-inch Real Eye. I-Balz Eyes are made up to 5/16-inch in the silver color. With I-Balz Eyes, you do not need the eye inserts, they come from the manufacturer with inserts in place. A 5/16-inch I-Balz minnow can be easily cast by a spinning rig.
For a 3-inch minnow I prefer a #2, Mustad Hook #33903 with a ¼-inch Real Eye. For a 2 ½-inch minnow I prefer a #4, Mustad Hook #33903 with a 7/32-inch Real Eye. For each hook size that I drop down, I go down 1/32-inch in the eye size. So for a ¾-inch minnow I prefer a #14, Mustad Hook #33903 with a 1/8-inch Dazl Eye
I prefer the Mustad 33903 Popper Hook because of its wiggle shank. Tying the eye into the wiggle and then super gluing it makes the most durable clouser ever made. Clousers tied on straight shank hooks begin to rotate after they are banged around a little bit. Where I live, we have lots of limestone on our banks and in our rivers. One of my favorite techniques for Smallmouth is to cast the minnow on the edge of the bank and let the current pull it into and across the stream. A straight shank clouser cannot withstand this abuse. If you don’t have Mustad Hooks then an Eagle Claw L200 can be substituted. As for the sturdiness of the Eagle Claw hook, I personally haven’t used them. We don’t have them in our area. With the reputation of Eagle Claw Hooks, I am sure they are more than adequate.
All of the materials in this recipe are manufactured by Spirit River, Inc. of Roseburg, Oregon. If your area shop does not handle their products. They can be purchased on the internet at www.fishinwhattheysee.com.
Step 1. Place the hook in the vise in the normal position, but I would hide the point in the jaws so as not to get stuck.
 Step 2. Level wind the thread (Gray, 8/0 Uni-Thread) from the eye of the hook to the beginning of the hook bend. Coat with cement.
Step 3. When preparing the Hanked Lite-Brite for your patterns cut it twice as long as needed. This will allow you to double it back when tying it in. This is better than tying it in, cutting it off at the tie in point, and then gluing. This material is very slick and will easily pull out. Gluing this material hardens it and causes it to break off where it is glued. Don’t glue in these patterns except where I suggest. Most tiers tend to make the first few minnows too bulky. Learning to “pull” the correct amount of material for each part of the pattern comes with practice. Because you will be doubling back the material, pull half as much as you think you need. Place it under your thread, double it back, and see if it is right. Remember all flies catch fish. Tie down the Tail portion of the fly (Pearl Blue Magic Hanked Lite-Brite) double it back and wrap down with five or six wraps.
Step 4. Tie in the Body portion of the pattern (Pearl Bodi-Braid) at the same point as you tied in the Tail. Wind the thread forward to the first wiggle in the hook shank. Wrap the Bodi-Braid forward to the first wiggle of the hook shank. Tie off and trim.
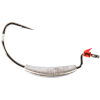
Step 5. Tie in the appropriate size Silver Real Eye. Use a crisscross method of wrapping until the eye is secure, then an under the eye, over the hook shank, under the eye, over the hook shank five or six times. Don’t super-glue the eye yet.
Step 6. Before super-gluing the eye, remove the hook from the vise. Place it on a flat surface with the hook point up and the eyes on the flat surface. Now adjust the hook point perpendicular with the eyes and the flat surface. This adjusting step is very important in making the minnow run right-side-up. Return the hook to the vise in the normal position and super-glue the threads tying in the eye. Make sure both sides of the eyes are saturated with glue.
Step 7. This is an optional step, however I think I get more strikes because of the realism it adds to my patterns. Behind the eye tie in two wraps of Fine Red Pearl Chenille or red yarn for the gills of your minnow. Move the thread in front of the eyes.
Step 8. From here on it is important to remember that this is a clouser style pattern. So with the hook in the vise in the normal position, the Belly is up and the Dorsum or Back is down. Remember the Back of the minnow will have the hook point sticking out of it. Tie in the Lower Side portion of the pattern (Pearl Blue Hanked Lite-Brite) right in front of the eyes. Double it back and “X” the Lower Side to eye. One or two X’s will be enough.
Step 9. Rotate the vise or the hook so the hook point is up. Tie in the Upper Side portion of the pattern (Silver Hanked Lite-Brite) in the same manner as you did the Lower Side. Right in front of the eye, double it back, and “X” the Upper Side to the eyes. Do not glue at this point.
Step 10. Wind the thread to the eye of the hook. Rotate the vise or the hook so the hook point is down and the belly of the fly is up. Tie in the Belly portion of the pattern (Pearl Blue Hanked Lite-Brite) at the eye of the hook. Tie it down, double it back, and use only two or three wraps to secure it. This is the place to conserve your thread wrappings. The smaller the snout of the minnow the more stable it will run.
Step 11. Rotate the vise or the hook so that the hook point is up and the belly of the fly is down. Tie in the first portion of the Dorsum or Back (Silver Hanked Lite-Brite). Use the same method as you did with the Belly portion. Tie it down, double the material back, and secure with a couple of wraps of thread.
Step 12. Tie in the second portion of the Dorsum or Back (River Green Hanked Lite-Brite) sparsely over the first portion of the Dorsum or Back. The second portion of the Dorsum or Back is sparse because it is supposed to give a blue-green hue to the mostly silver back of the Alewife.
Step 13. Wrap a fine head on the pattern keeping it small. Whip finish. Head cement the thread wraps of the snout only. I use a head cement that is half cement and half thinner. I want my glue to penetrate the threads not build up on them.
Step 14. For this step you will need a small brush and a piece of cardboard or sturdy-board. A mustache brush or a soft toothbrush will do fine. The cardboard or sturdy-board needs to be about six inches long and three inches wide. This will be your “Brushing, Trimming, and Coloring Board”. With your scissors make a hole in the board about on inch from one end and in the center. Make the hole just large enough to hold the eye of the minnow snuggly. Now brush both sides of the minnow before trimming. Trim your pattern making it look like a Slab-sided Alewife.
Step 15. Now place the pattern back on the board and color in the Cool Gray Prismacolor Pen Tail Fin and the Black shoulder spot behind and slightly above the eye. Do this to both sides. The rest of the fins are clear so you do not need to color them.
Congrats, you have tied your first FSACMP (Fox Statler’s Anatomically Correct Minnow Pattern), Now go fish!
Fishin' What They See,
Fox Statler, "Mr. Sowbug"
|